

Forces and sport
View Sequence overviewStudents will:
- design an infographic to communicate the important aspects of a sport or physical activity and the forces involved.
Students will represent their understanding as they:
- recall the concepts covered in the lesson sequence.
- evaluate an infographic.
- design an infographic poster about the forces and movement in a sport or physical activity.
- participate in a gallery walk and provide feedback using criteria.
In this lesson, assessment is summative.
Students working at the Achievement Standard should:
- relate the movement of people and objects in a sport or physical activity to unbalanced forces.
- explain examples of balanced forces in a sport or physical activity.
- represent forces using arrows showing direction and relative magnitude.
- describe the effect of mass and force on the motion of objects or people in a sport or physical activity.
- use correct scientific terminology when naming forces and the way they act on an object.
- create an infographic using appropriate language to communicate their ideas to a Year 7 audience.
Refer to the Australian Curriculum content links on the Our design decisions tab for further information.
Whole class
Forces and sport Slides
A playing area about 50-75 metres long by 35-50 metres wide
Size 2 or 3 soccer ball or touch football
Cones or markers to mark the score lines at opposing ends of a field
An object that can be used as the talking stick for the yarning circle
Each group
Infographic evaluation Resource sheet
Access to About the Indigenous seasonal calendars - CSIRO
Each student
Individual science notebook
Either:
- A3 paper (if students are completing the infographic on paper), or
- access to a computer (if students are creating a digital infographic)
Lesson
The Act phase empowers students to use the Core concepts and key ideas of science they have learned during the Inquire phase. It encourages students to develop a sense of responsibility as members of society—to act rather than be acted upon. It provides students with the opportunity to positively influence their own life and that of the world around them. For this to occur, students need to build foundational skills in an interactive mutually supportive environment with their community.
When designing the Act phase, consider ways that students could use their scientific knowledge and skills. Consider their interests and lifestyles that may intersect with the core concepts and key ideas. What context or problem would provide students with a way to use science to synthesise a design? How (and to whom) will students communicate their understanding?
Read more about using the LIA FrameworkEach student comes to the classroom with experiences made up from science-related knowledge, attitudes, experiences and resources in their life. The Connect routine is designed to tap into these experiences, and that of their wider community. It is also an opportunity to yarn with community leaders (where appropriate) to gain an understanding of the student’s lives, languages and interests. In the Act phase, this routine reconnects with the science capital of students so students can appreciate the relevance of their learning and the agency to make decisions and take action.
When designing a teaching sequence, consider the everyday occurrences, phenomena and experiences that might relate to the science that they have learned. How could students show agency in these areas?
Read more about using the LIA FrameworkPlaying a new game
(Slide 85) Invite students to play Buroinjin (“bur-oin-jin”), a running-and-passing traditional Indigenous game, to experience what it is like to play a new or unfamiliar game.
Explain that Buroinjin originated with the Kabi Kabi people of south Queensland. The traditional game was played with a kangaroo skin ball stuffed with grass. The game, played between teams from different groups, often lasted until sunset. Spectators engaged with the action by cheering “Ei, ei”, making the game a significant community event.
- Set out a playing area of about 50-75 metres long by 35-50 metres wide with markers or a line to mark the end of the opposite ends of the field. Divide students into two teams.
- The buroinjin (a size 2 or 3 soccer ball) is thrown into the air in the middle of the playing area to begin the game.
- The player that catches the ball should try to run over a line at the other end of the field without being touched by the opposing team. The buroinjin may be thrown to another player, but it cannot be hit with the fist or kicked. There are no player positions or offside, and the buroinjin can be thrown in any direction.
- The game does not stop if a player drops the buroinjin. Players must bend over and pick it up (they should not dive on the ball).
- If a player with the buroinjin is touched by a member of the opposing team, the ball should be thrown up (at least 2-3 metres in the air) by that player so the game can continue. The player who was touched may not catch the buroinjin.
- Possession changes through infringements such as intercepts, a player deliberately playing the buroinjin into another player, a player running out, and holding or obstructing an opponent.
- If a player carries the buroinjin past the score line, one point is scored. The game is then restarted.
Safety: For safety reasons players should not be allowed to dive on the ball on the ground—they must bend over and pick up the ball. In competing for a loose buroinjin players must avoid contact.
Other resources:
- Watch Traditional indigenous games - Buroinjin (3:01) to see the game being played.
- Read the Australian Sport Commission’s instruction card at Yulunga Traditional Indigenous Games.
After the game, discuss what it was like to learn a new game including the forces involved.
The Act phase empowers students to use the Core concepts and key ideas of science they have learned during the Inquire phase. It encourages students to develop a sense of responsibility as members of society—to act rather than be acted upon. It provides students with the opportunity to positively influence their own life and that of the world around them. For this to occur, students need to build foundational skills in an interactive mutually supportive environment with their community.
When designing the Act phase, consider ways that students could use their scientific knowledge and skills. Consider their interests and lifestyles that may intersect with the core concepts and key ideas. What context or problem would provide students with a way to use science to synthesise a design? How (and to whom) will students communicate their understanding?
Read more about using the LIA FrameworkScience education consists of a series of key ideas and core concepts that can explain objects, events and phenomena and link them to the experiences encountered by students in their lives. The purpose of the Anchor routine is to identify and link students’ learning to these ideas and concepts in a way that builds and deepens their understanding.
When designing the Act phase of a teaching sequence, consider the core concepts and key ideas that are relevant. The Anchor routine provides an opportunity to collate and revise the key knowledge and skills students have learned, in a way that emphasises the importance of science as a human endeavour.
What has been learnt? Forces and motion
(Slide 86) After playing Buroinjin, find an appropriate place to conduct a whole class yarning circle. Provide a brief description of a yarning circle as a method of knowledge exchange that embodies the oral traditions of storytelling in First Nations cultures, with “yarning” being a word for an informal conversation. See the embedded professional learning Yarning below for more information on how to best conduct a yarning circle.
Explain the purpose of the yarning circle is to:
- learn from the group, as each student brings with them their own story and lived experience.
- to consider how to communicate through pictures and images just as First Nations’ history, educational stories, and the stories of country, creation and tradition have been passed down through the generations through storytelling, rock art, sand drawings, and craft traditions for over 40 000 years.
Recall the traditional Indigenous games played throughout the lesson sequence. Pass the yarning stick around the circle, inviting students to share:
- what was challenging when learning a new game.
- what they have learnt about forces and motion.
- what information a new participant to their sport or physical activity would need to know about force and motion.
- how they plan to communicate clearly and accurately on their infographic.
Invite students to suggest what features would make a good infographic. Guide students to identify the following features as important.
- Clear and descriptive title that immediately communicates the topic of the infographic.
- Subheadings for different sections of information.
- Simple and logical layout.
- Relevant images and icons to help explain ideas.
- Colour to highlight important information and draw attention to key messages.
- Familiar graphics and clear language that the intended audience can easily recognise and understand.
- How do images, symbols, and colour help messages reach more people quickly?
- Why might people choose an infographic instead of long paragraphs to communicate an important idea?
- Why are visual messages important when communicating movement in sport or physical activities?
- In sport, how could clear communication about forces help athletes perform better or avoid injury?
- How do posters, infographics and public messages help communities stay safe, informed, or connected?
Move out of the yarning circle and into small groups. Distribute the Infographic evaluation Resource sheet.
(Slide 87) Examine the infographics:
- A CSIRO Indigenous seasonal calendar (by going to the website and choosing one for your local area: Indigenous seasonal calendars) and
- Beach fishing infographic (on the Resource sheet).
Discuss the key features found in each using the criteria found on the Resource sheet.
- What is the main message of each infographic?
- Does the fishing infographic clearly explain what a force is?
- Are the examples given accurate and easy to understand?
- Would someone new to fishing or the seasons learn something from the infographic?
- Are the infographics easy to read from a distance?
- Do the images and diagrams help explain the ideas?
- Do the infographics use colour, headings, and labels effectively?
- Is the information organised in a logical order?
- Do the infographics include only the most important information, without overcrowding the poster?
✎STUDENT NOTES: Identify three (3) positive features in both infographics and suggest two (2) features in the beach fishing infographic that could have been presented differently. Describe, using words or annotated diagrams, the features that will be included in your new infographic design.
Yarning
Yarning is a method of knowledge exchange in Aboriginal and Torres Strait Islander cultures.
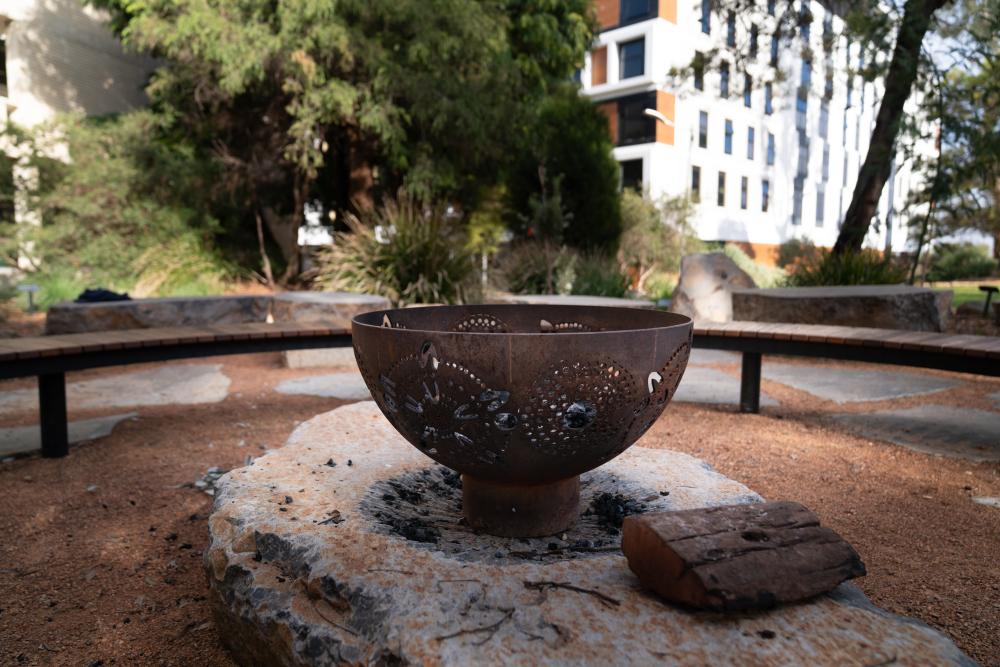
Yarning is a method of knowledge exchange that embodies the oral traditions of storytelling in Aboriginal and Torres Strait Islander cultures. Participating in a yarning circle offers the opportunity to revisit traditional Aboriginal cultural practices of coming together, sharing, growing, and strengthening relationships.
Before hosting, try to participate in a yarning circle yourself to experience first-hand the process of watching and listening rather than interrupting, and to understand the importance of creating respectful, non-judgmental environments for speaking truth and sharing knowledge.
A yarning circle is usually initiated or hosted by an individual—a teacher, a student, or a visitor. Yarning circles can take a few formats, but the following guidelines generally apply when initiating a yarning circle.
- Sit in a circle. Participants in the circle are encouraged to actively listen to others’ views. Participants should understand that they are all considered equal within the circle and that there is no hierarchy. You could begin with an Acknowledgement of Country. The yarning circle can be conducted in a classroom setting or in a larger area such as a breakout area, hall or a school yarning circle.
- Introduce the group: The host invites participants to introduce themselves and share something about themselves. In this context, it may be a sport or hobby that is important to them.
- Introduce focus questions: Yarning circles can be undertaken for many reasons. The host introduces the purpose of the yarning circle or the focus question to participants.
- Share ideas and thoughts: The host encourages participants to take turns to talk and to promote reciprocal sharing and learning. Sometimes, a clapping stick or message stick can be included if participants need a visual cue of who is currently speaking. Listening is more appropriate than talking. It’s a respectful practice and allows knowledge and information to be attained respectfully. By looking at or towards the speaker, if/where culturally appropriate, you take in non-verbal language cues and can learn in different ways. Time can be allocated for participants to write or draw their thoughts after each person speaks. The host could provide butcher’s paper in the middle of the circle for participants to record their thoughts, or hold the circle outside so participants can draw their thoughts in the dirt.
- Reflect: Resolve any actions or issues identified by the yarning circle or agree to follow up in future yarning circles
Questions about yarning
Watch Ask Aunty - Can a non-Indigenous person offer a yarning circle? (1:37) for an explanation of yarning circles.
See a yarning circle in practice
Watch VIS inaugural yarning circle | National Reconciliation Week 2025 by the Victorian Institute of Sport (VIS) showing people in a yarning circle as part of the 2025 National Reconciliation Week.
Yarning circle founding principles
Read the Yarning kits cultural guidance document developed by the University of Newcastle, which outlines the principles that should be followed for a yarning circle to be conducted in a culturally appropriate manner.
References
Queensland Curriculum & Assessment Authority (2020). Yarning circles Aboriginal & Torres Strait Islander perspectives; Queensland Government https://www.qcaa.qld.edu.au/about/k-12-policies/aboriginal-torres-strait-islander-perspectives/resources/yarning-circles
Newham, David and Groombridge, Sarah (2023). Yarning kits cultural guidance. The University of Newcastle https://www.newcastle.edu.au/__data/assets/pdf_file/0008/925379/2023-yarning-kits-cultural-guiding.pdf
State of New South Wales (Department of Education), (2023). Student voice through yarning. Department of Education NSW, https://education.nsw.gov.au/content/dam/main-education/teaching-and-learning/aec/media/documents/universal-resources-hub/Student_Voice_through_Yarning.pdf
Yarning is a method of knowledge exchange that embodies the oral traditions of storytelling in Aboriginal and Torres Strait Islander cultures. Participating in a yarning circle offers the opportunity to revisit traditional Aboriginal cultural practices of coming together, sharing, growing, and strengthening relationships.
Before hosting, try to participate in a yarning circle yourself to experience first-hand the process of watching and listening rather than interrupting, and to understand the importance of creating respectful, non-judgmental environments for speaking truth and sharing knowledge.
A yarning circle is usually initiated or hosted by an individual—a teacher, a student, or a visitor. Yarning circles can take a few formats, but the following guidelines generally apply when initiating a yarning circle.
- Sit in a circle. Participants in the circle are encouraged to actively listen to others’ views. Participants should understand that they are all considered equal within the circle and that there is no hierarchy. You could begin with an Acknowledgement of Country. The yarning circle can be conducted in a classroom setting or in a larger area such as a breakout area, hall or a school yarning circle.
- Introduce the group: The host invites participants to introduce themselves and share something about themselves. In this context, it may be a sport or hobby that is important to them.
- Introduce focus questions: Yarning circles can be undertaken for many reasons. The host introduces the purpose of the yarning circle or the focus question to participants.
- Share ideas and thoughts: The host encourages participants to take turns to talk and to promote reciprocal sharing and learning. Sometimes, a clapping stick or message stick can be included if participants need a visual cue of who is currently speaking. Listening is more appropriate than talking. It’s a respectful practice and allows knowledge and information to be attained respectfully. By looking at or towards the speaker, if/where culturally appropriate, you take in non-verbal language cues and can learn in different ways. Time can be allocated for participants to write or draw their thoughts after each person speaks. The host could provide butcher’s paper in the middle of the circle for participants to record their thoughts, or hold the circle outside so participants can draw their thoughts in the dirt.
- Reflect: Resolve any actions or issues identified by the yarning circle or agree to follow up in future yarning circles
Questions about yarning
Watch Ask Aunty - Can a non-Indigenous person offer a yarning circle? (1:37) for an explanation of yarning circles.
See a yarning circle in practice
Watch VIS inaugural yarning circle | National Reconciliation Week 2025 by the Victorian Institute of Sport (VIS) showing people in a yarning circle as part of the 2025 National Reconciliation Week.
Yarning circle founding principles
Read the Yarning kits cultural guidance document developed by the University of Newcastle, which outlines the principles that should be followed for a yarning circle to be conducted in a culturally appropriate manner.
References
Queensland Curriculum & Assessment Authority (2020). Yarning circles Aboriginal & Torres Strait Islander perspectives; Queensland Government https://www.qcaa.qld.edu.au/about/k-12-policies/aboriginal-torres-strait-islander-perspectives/resources/yarning-circles
Newham, David and Groombridge, Sarah (2023). Yarning kits cultural guidance. The University of Newcastle https://www.newcastle.edu.au/__data/assets/pdf_file/0008/925379/2023-yarning-kits-cultural-guiding.pdf
State of New South Wales (Department of Education), (2023). Student voice through yarning. Department of Education NSW, https://education.nsw.gov.au/content/dam/main-education/teaching-and-learning/aec/media/documents/universal-resources-hub/Student_Voice_through_Yarning.pdf
The Act phase empowers students to use the Core concepts and key ideas of science they have learned during the Inquire phase. It encourages students to develop a sense of responsibility as members of society—to act rather than be acted upon. It provides students with the opportunity to positively influence their own life and that of the world around them. For this to occur, students need to build foundational skills in an interactive mutually supportive environment with their community.
When designing the Act phase, consider ways that students could use their scientific knowledge and skills. Consider their interests and lifestyles that may intersect with the core concepts and key ideas. What context or problem would provide students with a way to use science to synthesise a design? How (and to whom) will students communicate their understanding?
Read more about using the LIA FrameworkWhen students use their knowledge and skills in new ways, they also have an opportunity to develop and use their creative and critical thinking skills. With scaffolded support, they can become more confident to work in a team and develop a stronger sense of autonomy. This results in stronger student outcomes, attitudes and sense of empowerment.
When designing a teaching sequence, consider what activity would allow students to showcase their knowledge and skills. Consider the current abilities of your students. What are they capable of explaining? What props could they design or build that would support their explanations? How much information would they need in their design brief to support their thinking? How does this connect with their lives and interests?
Designing an infographic
(Slide 88) Students design an infographic to show how forces affect movement in a sport or physical activity for new or improving players.
Ideate
Brainstorm all the information about forces that could be included on the infographic. Encourage students to include all possible ideas at this stage.
- What different types of forces could you include?
- How does gravity affect the player or equipment?
- How does friction help or prevent movement?
- How do forces change the speed or direction of movement?
- What equipment is involved, and what forces act on it?
- What facts, key words, or definitions should you include?
- What diagrams, symbols, or pictures could help explain the forces?
- What interesting facts or “Did you know?” information could make your infographic more engaging?
- What questions might a beginner ask about forces in this sport?
Design
Group ideas into categories such as how to move the body, move equipment, speed up, slow down, or change direction. Encourage students to use the new terms related to forces learnt in this teaching sequence.
Infographics have limited space. Encourage students to identify the key information that will be needed or used by a beginner to the sport or physical activity. The infographic could take many forms depending on the time and resources available. It may be as simple as a detailed drawing with labels and explanations, or a digitally created poster.
Discuss with students the criteria that may be required in their infographic. This may include:
The context
- Three important movements or skills from a chosen sport or physical activity.
The science
- A clear description of the forces involved in each movement.
- Force diagrams with arrows showing direction and relative magnitude.
- Examples of balanced and unbalanced forces.
- At least one contact force (e.g. friction, push, pull, air resistance, tension).
- At least one non-contact force (e.g. gravity, magnetism if relevant).
- A description of how motion changes depending on mass and force magnitude.
Communication skills
- Correct scientific vocabulary (force, friction, gravity, balanced, unbalanced, motion, mass).
- Organised layout (rows, columns or sections) using icons and simple symbols, visual comparisons (e.g. balanced vs unbalanced, before, after), labelled diagrams and consistent visual coding (net force in same colour always).
- The language used would allow peers to understand the infographic information and message.
Allow students time to complete a draft of their infographic.
The Act phase empowers students to use the Core concepts and key ideas of science they have learned during the Inquire phase. It encourages students to develop a sense of responsibility as members of society—to act rather than be acted upon. It provides students with the opportunity to positively influence their own life and that of the world around them. For this to occur, students need to build foundational skills in an interactive mutually supportive environment with their community.
When designing the Act phase, consider ways that students could use their scientific knowledge and skills. Consider their interests and lifestyles that may intersect with the core concepts and key ideas. What context or problem would provide students with a way to use science to synthesise a design? How (and to whom) will students communicate their understanding?
Read more about using the LIA FrameworkA key part of Science Inquiry, the Communicate routine provides students with an opportunity to communicate their ideas effectively to others. It allows students a chance to show their learning to members of their community and provides a sense of belonging. It also encourages students to have a sense of responsibility to share their understanding of science and to use this to provide a positive influence in the community.
When designing a teaching sequence, consider who might be connected to the students that have an interest in science. Who in their lives could share their learning? What forum could be used to build an enthusiasm for science. Are there members of the community (parents, teachers, peers or wider community) who would provide a link to future science careers?
Read more about using the LIA FrameworkPresenting the infographic and receiving feedback
Receiving feedback is an important part of the design process. This feedback could be from class visitors, a teacher or student peers.
Encourage students to display their draft design around the room and invite them to participate in a gallery walk to view and give feedback on the infographics.
Discuss with students the form that this feedback could take. For example, students could use:
- sticky notes identifying the best elements.
- sentence starters ‘I like …’, ‘Have you thought of…’, or ‘I didn’t know that…’.
- Two stars and a wish.
- TAG (Tell the author something you like, Ask a question, Give a suggestion).
- a structured feedback form, checklist, or a rubric.
Allow students time to use the feedback to prepare a finalised form of their infographic.
Reflect on the sequence
You might invite students to:
- reflect on the design process and what they would do differently next time.
- reflect on the importance of communication tools like infographics to change people’s perceptions or ideas.
- reflect how the learning from this lesson sequence has led to an increased understanding of First Nations Australians’ unique ways of being, knowing, thinking and doing.
- consider how the learning from this teaching sequence may have impacted the way students play their chosen sport or physical activity, the way they train, or their choice of equipment they use.
- research a career involved in the physics of sport such as:
- biomechanics. They can start by watching A day in the life of a biomechanist (2:11) by the NSW Institute of Sport.
- sports scientists. They can start by watching A day in the life of a sports scientist (2:43) by the Olympic Games.
Using Generative AI tools to create a peer feedback checklist
Careful use of AI tools can support teachers in developing checklists.
Artificial intelligence tools can provide support in developing assessment rubrics; however, the quality of the output depends heavily on the clarity of the prompt, the inclusion of curriculum standards, and the specificity of the assessment criteria provided. The draft rubric produced will need to be carefully checked for clarity, coherence, and class-appropriate content. AI cannot replace professional judgement; rather, it assists it when used strategically.
1. Start with the standard, not the tool
Effective rubric design begins with curriculum alignment. Before using a Generative AI tool, identify the following criteria:
- the relevant achievement standard.
- the content descriptors being assessed.
- the cognitive demand (e.g. explain, analyse, evaluate, construct).
Providing the achievement standard directly within the prompt ensures that the Generative AI tool anchors the rubric to expected student performance. For example, including wording such as: “Students apply an understanding of the effect of mass and the magnitude and direction of forces on an object’s motion …” guides the Generative AI tool to align descriptors to the required depth of knowledge and skill.
Without this anchor, Generative AI tools may generate generic criteria that lack alignment to reporting requirements.
2. Specify the assessment components clearly
Generative AI tools perform best when the task requirements are explicitly broken down. Instead of asking “Write a rubric for a forces infographic design project”, a more effective prompt would include:
- the science concepts required.
- the skills students must demonstrate (data analysis, calculation, argument construction).
- the design or application component.
- the communication expectations.
Breaking the assessment into categories (e.g. science understanding, design application, communication) produces a rubric that reflects the multidimensional nature of authentic tasks.
3. Define performance levels explicitly
To generate meaningful performance bands (e.g. Well Below Standard to Well Above Standard), the prompt should:
- provide the wording for “At Standard”.
- clarify what progression should look like (increasing complexity, accuracy, independence, evaluation).
Generative AI tools can then scale descriptors logically:
- Below Standard → partial understanding, limited analysis
- At Standard → accurate application, appropriate analysis
- Above Standard → detailed reasoning, evaluation, integration
- Well Above Standard → sophisticated, critical, and reflective reasoning
Without this structure, descriptors may become repetitive rather than developmental.
4. Use cognitive verbs intentionally
Assessment criteria should reflect increasing cognitive demand. Guide Generative AI tools by incorporating verbs such as define, describe, explain, etc.
This ensures that higher performance levels demonstrate deeper reasoning rather than simply “more detail”.
5. Prompt for evidence-based language
AI-generated rubrics are stronger when prompts require:
- evidence-based reasoning.
- identification of assumptions.
- consideration of conflicting evidence.
- data analysis and anomaly identification.
These elements align with upper-primary and secondary achievement standards and promote higher-order thinking.
6. Maintain professional judgement
AI-generated rubrics should always be reviewed and refined. Consider the accessibility of the language, the appropriateness of the context, and its ability to separate students’ grades appropriately. Generative AI drafts accelerate the process, but professional expertise ensures validity. If the first attempt is not appropriate for the class, readdress the prompt and try again.
Example of a strong generative AI prompt template
Write an Australian Year [year/level] assessment rubric for a task where students will [outline the task e.g. create an infographic that identifies the forces involved in a sport].
Align the rubric to the following achievement standard:
[Paste the full Science Understanding standard]
The task requires students to: [outline all the Science as a Human Endeavour and Science Inquiry criteria required]
Organise the rubric into the following categories: [outline the key elements of the design e.g. the science, the design, communication of design]
Include five performance levels in columns: Well Below Standard, Below Standard, At Standard, Above Standard, Well Above Standard.
“At Standard” must align directly to the achievement standard.
Ensure progression across levels reflects increasing depth of analysis, use of evidence, and critical thinking.
Include references to assumptions, data analysis, and evidence-based reasoning where appropriate.
Further reading
Commonwealth of Australia. (2023). Australian framework for generative artificial intelligence in schools. Commonwealth of Australia. <https://www.education.gov.au/schooling/resources/australian-framework-generative-artificial-intelligence-ai-schools>
Artificial intelligence tools can provide support in developing assessment rubrics; however, the quality of the output depends heavily on the clarity of the prompt, the inclusion of curriculum standards, and the specificity of the assessment criteria provided. The draft rubric produced will need to be carefully checked for clarity, coherence, and class-appropriate content. AI cannot replace professional judgement; rather, it assists it when used strategically.
1. Start with the standard, not the tool
Effective rubric design begins with curriculum alignment. Before using a Generative AI tool, identify the following criteria:
- the relevant achievement standard.
- the content descriptors being assessed.
- the cognitive demand (e.g. explain, analyse, evaluate, construct).
Providing the achievement standard directly within the prompt ensures that the Generative AI tool anchors the rubric to expected student performance. For example, including wording such as: “Students apply an understanding of the effect of mass and the magnitude and direction of forces on an object’s motion …” guides the Generative AI tool to align descriptors to the required depth of knowledge and skill.
Without this anchor, Generative AI tools may generate generic criteria that lack alignment to reporting requirements.
2. Specify the assessment components clearly
Generative AI tools perform best when the task requirements are explicitly broken down. Instead of asking “Write a rubric for a forces infographic design project”, a more effective prompt would include:
- the science concepts required.
- the skills students must demonstrate (data analysis, calculation, argument construction).
- the design or application component.
- the communication expectations.
Breaking the assessment into categories (e.g. science understanding, design application, communication) produces a rubric that reflects the multidimensional nature of authentic tasks.
3. Define performance levels explicitly
To generate meaningful performance bands (e.g. Well Below Standard to Well Above Standard), the prompt should:
- provide the wording for “At Standard”.
- clarify what progression should look like (increasing complexity, accuracy, independence, evaluation).
Generative AI tools can then scale descriptors logically:
- Below Standard → partial understanding, limited analysis
- At Standard → accurate application, appropriate analysis
- Above Standard → detailed reasoning, evaluation, integration
- Well Above Standard → sophisticated, critical, and reflective reasoning
Without this structure, descriptors may become repetitive rather than developmental.
4. Use cognitive verbs intentionally
Assessment criteria should reflect increasing cognitive demand. Guide Generative AI tools by incorporating verbs such as define, describe, explain, etc.
This ensures that higher performance levels demonstrate deeper reasoning rather than simply “more detail”.
5. Prompt for evidence-based language
AI-generated rubrics are stronger when prompts require:
- evidence-based reasoning.
- identification of assumptions.
- consideration of conflicting evidence.
- data analysis and anomaly identification.
These elements align with upper-primary and secondary achievement standards and promote higher-order thinking.
6. Maintain professional judgement
AI-generated rubrics should always be reviewed and refined. Consider the accessibility of the language, the appropriateness of the context, and its ability to separate students’ grades appropriately. Generative AI drafts accelerate the process, but professional expertise ensures validity. If the first attempt is not appropriate for the class, readdress the prompt and try again.
Example of a strong generative AI prompt template
Write an Australian Year [year/level] assessment rubric for a task where students will [outline the task e.g. create an infographic that identifies the forces involved in a sport].
Align the rubric to the following achievement standard:
[Paste the full Science Understanding standard]
The task requires students to: [outline all the Science as a Human Endeavour and Science Inquiry criteria required]
Organise the rubric into the following categories: [outline the key elements of the design e.g. the science, the design, communication of design]
Include five performance levels in columns: Well Below Standard, Below Standard, At Standard, Above Standard, Well Above Standard.
“At Standard” must align directly to the achievement standard.
Ensure progression across levels reflects increasing depth of analysis, use of evidence, and critical thinking.
Include references to assumptions, data analysis, and evidence-based reasoning where appropriate.
Further reading
Commonwealth of Australia. (2023). Australian framework for generative artificial intelligence in schools. Commonwealth of Australia. <https://www.education.gov.au/schooling/resources/australian-framework-generative-artificial-intelligence-ai-schools>