

Water mixture rescue
View Sequence overviewStudents will:
- investigate Australian rainwater quality guidelines for dissolved solids.
- observe and explain dissolving, including the key terms solute, solvent, and solution.
- plan an investigation to test for dissolved solids by evaporation.
- compare results across groups to evaluate dissolved solid content.
Students will represent their understanding as they:
- identify a variety of variables in a crystallisation investigation and how they could be controlled.
- identify risks to themselves and others in investigations and consider actions that can be taken to avoid or manage those risks.
- use appropriate standard units and perform simple unit conversions when recording data.
- illustrate their understanding of the process of crystallisation.
In this lesson, assessment is formative.
Feedback might focus on students’ ability to:
- identify the solute and solvent in the rainwater solution.
- identify risks and modify methods to minimise risk.
- follow a crystallisation method to identify the amount of dissolved solids.
- evaluate the validity of group results in comparison to class results.
- apply their understanding of crystallisation to the acceptable amount of dissolved solids in the Australian drinking water guidelines.
Potential summative assessment
Students working at standard should:
- examine different solutions and identify the solvent and solute.
- investigate and use a range of physical separation techniques such as evaporation, crystallisation, and distillation.
- explore and compare separation methods used in a variety of situations such as in the home, recycling industries and purifying water.
- examine the features of reproducible investigations, constructing methods and reviewing other students’ methods.
- identify risks to themselves and others in investigations and consider actions that can be taken to avoid or manage those risks.
- use appropriate standard units and perform simple unit conversions when recording data.
- identify anomalies in data and investigate their effect on observed patterns or relationships.
- consider the spread of repeated measurements and observations.
Whole class
Water mixture rescue Slides
Salt
Water
1 x 200 mL beaker
1 x teaspoon
Optional: distillation equipment
Each group
Bunsen burner
Safety mat
Tripod
Gauze mat
Evaporating dish
Filtered and separated rainwater sample
Watch glass
Safety glasses
Matches
1 x 100 mL measuring cylinder
Balance to determine the mass of the evaporated solids
Each student
Individual science notebook
Dissolved solids Resource sheet
Calculator
Lesson
The Inquire phase allows students to cycle progressively and with increasing complexity through the key science ideas related to the core concepts. Each Inquire cycle is divided into three teaching and learning routines that allow students to systematically build their knowledge and skills in science and incorporate this into their current understanding of the world.
When designing a teaching sequence, it is important to consider the knowledge and skills that students will need in the final Act phase. Consider what the students already know and identify the steps that need to be taken to reach the level required. How could you facilitate students’ understanding at each step? What investigations could be designed to build the skills at each step?
Read more about using the LIA FrameworkRe-orient
(Slide 53) Revise the different substances that were originally in the rainwater mixture, including:
- soil and sand blown onto the roof.
- leaves from nearby trees or grass.
- iron filings from scratches on the iron roof.
- oil from car exhausts.
- water from heavy rain washing everything into the water tank.
(Slide 54) Discuss how:
- iron filings were removed by a magnet (magnetic properties).
- leaves and grass were removed through filtering (separation based on size).
- sand (sedimentation) and oil were removed because of their different densities.
The Inquire phase allows students to cycle progressively and with increasing complexity through the key science ideas related to the core concepts. Each Inquire cycle is divided into three teaching and learning routines that allow students to systematically build their knowledge and skills in science and incorporate this into their current understanding of the world.
When designing a teaching sequence, it is important to consider the knowledge and skills that students will need in the final Act phase. Consider what the students already know and identify the steps that need to be taken to reach the level required. How could you facilitate students’ understanding at each step? What investigations could be designed to build the skills at each step?
Read more about using the LIA FrameworkIdentifying and constructing questions is the creative driver of the inquiry process. It allows students to explore what they know and how they know it. During the Inquire phase of the LIA Framework, the Question routine allows for past activities to be reviewed and to set the scene for the investigation that students will undertake. The use of effective questioning techniques can influence students’ view and interpretation of upcoming content, open them to exploration and link to their current interests and science capital.
When designing a teaching sequence, it is important to spend some time considering the mindset of students at the start of each Inquire phase. What do you want students to be thinking about, what do they already know and what is the best way for them to approach the task? What might tap into their curiosity?
Read more about using the LIA FrameworkDissolve or disappear
(Slide 55) Remind students of the Australian Government rainwater quality requirements. Draw students’ attention to how the water in its current state (being relatively clear/transparent and odourless) could be used for garden irrigation, toilet flushing, and clothes washing.
Discuss how the next stage of use (showering and bathing) requires the rainwater to be low in dissolved solids.
Pose the question: What does “dissolve” mean?
Demonstrate dissolving by mixing a teaspoon of salt in water. Discuss how students could test if the salt is still in the water by taste (not recommended in a science lab) or conductivity. Explain that this is what is meant by a “dissolved solid”.
- When the salt “disappears”, where do you think it goes?
- What does it mean for something to be “dissolved”?
- How could we show that the salt is still in the water even though we can’t see it?
- If we left the water to evaporate, what might happen?
- What do you imagine the salt looks like after it dissolves, at a tiny (particle) level?
- Why can’t we see the salt anymore once it’s dissolved?
- What is a “solution”? What are its parts?
- How is dissolving different from melting or disappearing?
(Slide 56) Explain that there are words to describe each of the substances in this demonstration. The substance that dissolved (salt) is called the solute. The substance that it dissolves in is called the solvent.
✎ STUDENT NOTES: Write the definitions of “solute” (the substance that dissolves), “solvent” (the dissolving medium), and “solution” (a homogeneous mixture of two or more substances).
(Slide 57) Emphasise that the Australian Government rainwater requirements suggest that showering and drinking need to have low amounts of solutes in the water.
Pose the question: How can we test if dissolved solids are in the rainwater mixture?
The Inquire phase allows students to cycle progressively and with increasing complexity through the key science ideas related to the core concepts. Each Inquire cycle is divided into three teaching and learning routines that allow students to systematically build their knowledge and skills in science and incorporate this into their current understanding of the world.
When designing a teaching sequence, it is important to consider the knowledge and skills that students will need in the final Act phase. Consider what the students already know and identify the steps that need to be taken to reach the level required. How could you facilitate students’ understanding at each step? What investigations could be designed to build the skills at each step?
Read more about using the LIA FrameworkThe Investigate routine provides students with an opportunity to explore the key ideas of science, to plan and conduct an investigation, and to gather and record data. The investigations are designed to systematically develop content knowledge and skills through increasingly complex processes of structured inquiry, guided inquiry and open inquiry approaches. Students are encouraged to process data to identify trends and patterns and link them to the real-world context of the teaching sequence.
When designing a teaching sequence, consider the diagnostic assessment (Launch phase) that identified the alternative conceptions that students held. Are there activities that challenge these ideas and provide openings for discussion? What content knowledge and skills do students need to be able to complete the final (Act phase) task? How could you systematically build these through the investigation routines? Are there opportunities to build students’ understanding and skills in the science inquiry processes through the successive investigations?
Read more about using the LIA FrameworkCrystallisation
(Slide 58) Discuss how it can be difficult to remove the dissolved solids because the particles are too small and evenly mixed in the homogeneous solution. Explain that there are two ways to test if there are dissolved solids in the water:
- remove the solids from the solution.
- remove the water from the solution.
- Why is it difficult to separate the salt once it has dissolved in water?
- What is meant by the particles that are “too small to see”?
- How are the salt particles spread throughout the water?
- What does “evenly mixed” (a homogeneous solution) look like in this example?
- Why can’t we use simple methods like filtering to remove dissolved salt?
- How is a dissolved solid different from something that just settles at the bottom?
- What happens if we let the water evaporate?
Discuss how water can be removed via evaporation, leaving behind any solids that were dissolved in the water. If required, discuss how evaporation is the process of particles gaining energy, moving faster, and changing phase from a liquid to a gas.
Provide students with a copy of Dissolved solids test Resource sheet. Explain how students will be using a Bunsen burner to evaporate the water and leave the dissolved solids behind.
✎ STUDENT NOTES: Write an aim for the activity on the Dissolved solids Resource sheet.
(Slide 59) Discuss the Australian drinking water guidelines and the need to produce reliable and reproducible test results.
Pose the question: How can we compare the amount of dissolved substances left after the water evaporates?
Discuss the need to control the variables in the test so that students can compare their results at the end. As a class, decide the volume of rainwater mixture that will be used. Encourage students to consider mixing the rainwater before measurement, and how to ensure that none of the mixture is “lost” during the measurement and pouring process.
✎ STUDENT NOTES: Record the controlled variables and how they will be controlled in this investigation.
(Slide 60) Discuss the risk of the mixture “spitting” crystallised mixture when most of the water has evaporated, and the need to keep safety glasses on at all times. Students may also place a watch glass over the evaporating dish when most of the water is evaporated to reduce the risk.
✎ STUDENT NOTES: Draw a labelled diagram of the equipment that will be used and how the risks will be controlled during the investigation.
(Slide 61) Allow students time to complete the investigation.
Crystallisation
Crystallisation is a separation technique used to recover a dissolved solid (solute) from a solution.
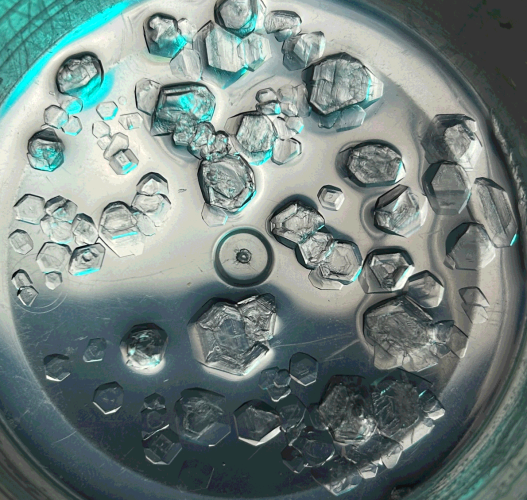
Crystallisation is a separation technique used to recover a dissolved solid (solute) from a solution. In this activity, students heat a rainwater sample to evaporate the solvent (water), leaving behind any dissolved solids as visible crystals.
At a particle level, dissolving occurs when solute particles break apart and become evenly distributed among the solvent particles, forming a homogeneous solution. Because these particles are extremely small and uniformly mixed, they cannot be removed by simple filtration. However, when the solvent evaporates, the dissolved particles come closer together and begin to rearrange into a regular, repeating pattern, forming solid crystals.
Common misconceptions include the idea that dissolved substances are no longer present or that clear/transparent solutions are pure. This experiment provides concrete evidence to challenge those ideas by allowing students to see the solid reform.
Crystallisation is a separation technique used to recover a dissolved solid (solute) from a solution. In this activity, students heat a rainwater sample to evaporate the solvent (water), leaving behind any dissolved solids as visible crystals.
At a particle level, dissolving occurs when solute particles break apart and become evenly distributed among the solvent particles, forming a homogeneous solution. Because these particles are extremely small and uniformly mixed, they cannot be removed by simple filtration. However, when the solvent evaporates, the dissolved particles come closer together and begin to rearrange into a regular, repeating pattern, forming solid crystals.
Common misconceptions include the idea that dissolved substances are no longer present or that clear/transparent solutions are pure. This experiment provides concrete evidence to challenge those ideas by allowing students to see the solid reform.
The Inquire phase allows students to cycle progressively and with increasing complexity through the key science ideas related to the core concepts. Each Inquire cycle is divided into three teaching and learning routines that allow students to systematically build their knowledge and skills in science and incorporate this into their current understanding of the world.
When designing a teaching sequence, it is important to consider the knowledge and skills that students will need in the final Act phase. Consider what the students already know and identify the steps that need to be taken to reach the level required. How could you facilitate students’ understanding at each step? What investigations could be designed to build the skills at each step?
Read more about using the LIA FrameworkFollowing an investigation, the Integrate routine provides time and space for data to be evaluated and insights to be synthesized. It reveals new insights, consolidates and refines representations, generalises context and broadens students’ perspectives. It allows student thinking to become visible and opens formative feedback opportunities. It may also lead to further questions being asked, allowing the Inquire phase to start again.
When designing a teaching sequence, consider the diagnostic assessment that was undertaken during the Launch phase. Consider if alternative conceptions could be used as a jumping off point to discussions. How could students represent their learning in a way that would support formative feedback opportunities? Could small summative assessment occur at different stages in the teaching sequence?
Read more about using the LIA FrameworkDissolved solids
Discuss the crystals that were formed as a result of evaporating the water from the mixture. Explain that this process of separating a mixture is called “crystallisation”. Describe a crystal as a solid shape that has flat surfaces and sharp edges.
- What did the crystals look like (shape, size, colour)?
- How did the appearance of the crystals compare between different groups?
- Why do crystals form instead of the solid remaining as a powder?
- Why is this method of separating a mixture called crystallisation?
- What role does evaporation play in forming crystals?
- How might the rate of evaporation affect crystal size and shape?
- Slow evaporation allows the particles to carefully rearrange themselves so that they form an ordered pattern called a lattice. The result is larger crystals.
- How could impurities in the solution affect the crystals formed?
- Impurities interrupt the regular arrangement of particles, making the crystals more uneven.
- Did all groups produce similar crystals? If not, what might explain the differences?
- Patterns will vary depending on how quickly the water evaporates, the level of impurities, and the heterogeneous level of the mixture.
- Were there any unexpected results in crystal formation? What could have caused them?
(Slide 62-63) ✎ STUDENT NOTES: Write the definition of crystallisation: the process of removing the liquid solvent from a solution so that the solute forms crystals. Draw a labelled diagram that represents a homogeneous solution before crystallisation, and the crystals formed after crystallisation.
Note: Photographing the outcome of the crystallisation process will allow students to compare the effectiveness of each separation technique in the Act phase.
Invite students to participate in a gallery walk, noting the ways different students represent their understanding of crystallisation. Encourage students to reflect on the accuracy of their diagrams and to modify their own drawings as a result of their observations.
Compare students’ investigation results, identifying any anomalies and exploring possible errors that may have led to variations in the amount of dissolved solids. Discuss the precision of the results—how closely together or similar the individual groups’ results were to each other.
- How do the results between different students/groups compare? Are there any clear outliers?
- Which samples showed the highest and lowest amounts of dissolved solids, and how consistent are these across groups?
- Could any anomalies be due to measurement error rather than actual differences in dissolved solids?
- How might inaccuracies in measuring mass, volume, or temperature impact the calculation of the final dissolved solids?
- Were all groups following the same procedure consistently? If not, how could differences in technique affect results?
- How could the experimental method be improved to reduce variation?
- Which results seem most reliable, and what makes them trustworthy?
- How does sample size (number of trials) influence confidence in the results?
- If this experiment were conducted in a professional lab, how would scientists make sure their method was valid?
- Testing a sample of water with a known amount of dissolved solids.
(Slide 64) Guide students to calculate the amount of dissolved solids determined in this test as mg/L.
Compare the students’ results to the Australian drinking water guidelines as shown on Slide 58. Discuss if the rainwater sample would be considered ‘drinkable’.
(Slide 65) ✎ STUDENT NOTES: Use argumentation to make a claim about the drinkability of the rainwater sample.
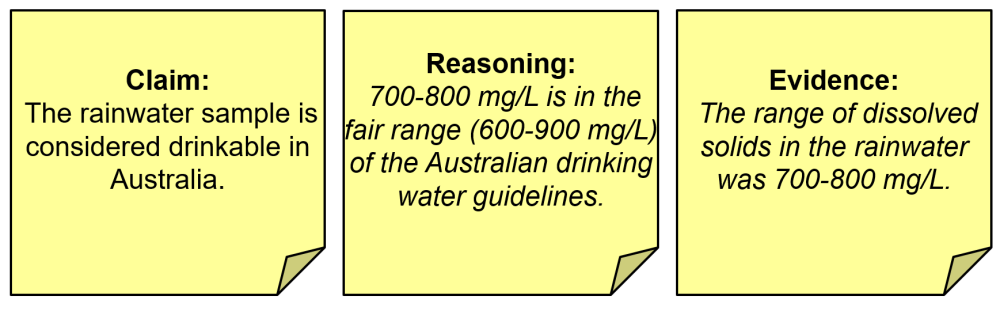
Discuss the students’ claims and the evidence and reasoning they used to support their ideas.
Optional: Demonstrate how water can be collected from this process through the use of distillation.
Optional: Students prepare a scientific report on this activity.
Discuss how these solids would have come from the dust and dirt that was blown on the roof by the wind. Explain to students that this test does not provide information about what the solids are, and that in the next lesson, they will be learning a new test (chromatography) that helps to identify the different substances that are in the water.
Reflect on the lesson
You might ask students to:
- add new terms (solution, solute, solvent, crystallisation) to the glossary.
- draw a step-by-step diagram showing the process of crystallisation.
- research how sea salt or sugar is produced.
- create a short comic strip showing the journey of dissolved particles turning into crystals.
Gallery walk
A gallery walk is a collaborative discussion strategy that provides an opportunity for feedback.
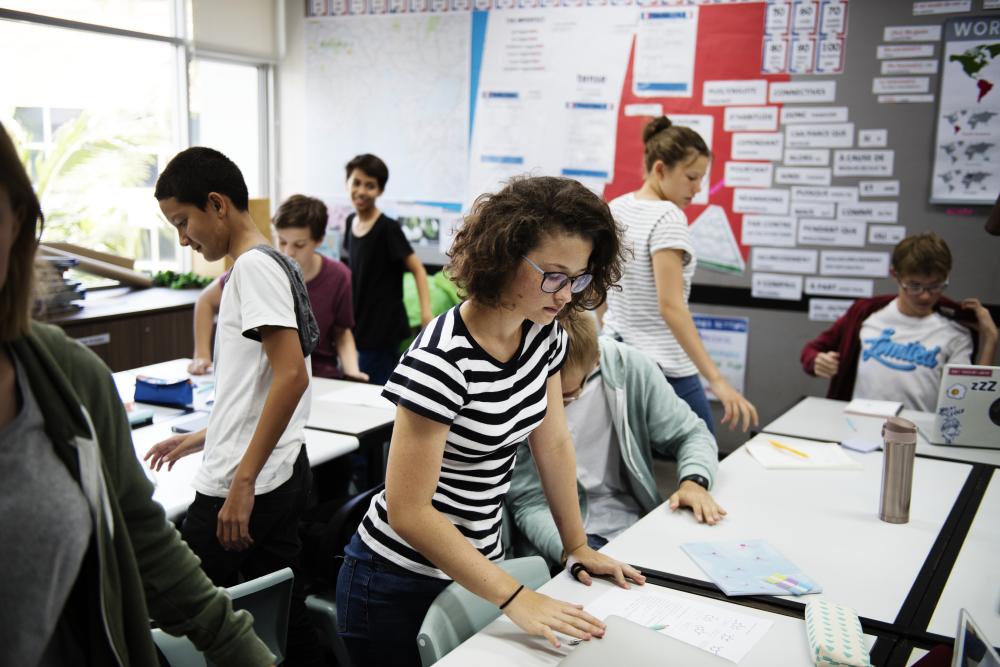
A gallery walk is a collaborative discussion strategy that provides an opportunity for feedback: student to student, and teacher to student.
Before the gallery walk
Encourage students to reflect on their own experience of the task and to focus their attention on the science they may expect to see in the claims, reasoning, and evidence.
During the gallery walk
The role of students is that of a critical audience. They move around the classroom like they are in an art gallery, in silence or whispering with a partner. The purpose of this activity is for them to notice how similar or different others’ work is to their own. As students view and read others’ claims, they record relevant comments and questions about the science onto sticky notes, which they can put beside the claim.
Encourage students to take their time to read the evidence and reasoning, as well as remind them to be respectful when they write comments. Students should include positive comments as well as ask questions about things not covered or displayed. Students may use the sentence stems “I like…” and “I wonder if…”. They should sign their comments to show ownership of them, as members of their class science community.
After the gallery walk
A gallery walk provides time for each student to reflect on and revisit the task. It allows students to see how others approached the task, as well as providing an opportunity for them to make alterations to their own work. During the whole class discussion, sticky notes can be used as a source of student feedback to explore students’ scientific thinking more deeply and call upon individuals to clarify their comments.
A gallery walk is not show-and-tell
It is important to note that a gallery walk is not a “show-and-tell” activity, for students to simply share their work and comment on how it looks. The gallery walk is a pedagogical tool that gives all students the opportunity to critically view and reflect on their class’s scientific activity. In real life, scientists share their work with the scientific community through conferences and publishing in scientific journals.
A gallery walk is a collaborative discussion strategy that provides an opportunity for feedback: student to student, and teacher to student.
Before the gallery walk
Encourage students to reflect on their own experience of the task and to focus their attention on the science they may expect to see in the claims, reasoning, and evidence.
During the gallery walk
The role of students is that of a critical audience. They move around the classroom like they are in an art gallery, in silence or whispering with a partner. The purpose of this activity is for them to notice how similar or different others’ work is to their own. As students view and read others’ claims, they record relevant comments and questions about the science onto sticky notes, which they can put beside the claim.
Encourage students to take their time to read the evidence and reasoning, as well as remind them to be respectful when they write comments. Students should include positive comments as well as ask questions about things not covered or displayed. Students may use the sentence stems “I like…” and “I wonder if…”. They should sign their comments to show ownership of them, as members of their class science community.
After the gallery walk
A gallery walk provides time for each student to reflect on and revisit the task. It allows students to see how others approached the task, as well as providing an opportunity for them to make alterations to their own work. During the whole class discussion, sticky notes can be used as a source of student feedback to explore students’ scientific thinking more deeply and call upon individuals to clarify their comments.
A gallery walk is not show-and-tell
It is important to note that a gallery walk is not a “show-and-tell” activity, for students to simply share their work and comment on how it looks. The gallery walk is a pedagogical tool that gives all students the opportunity to critically view and reflect on their class’s scientific activity. In real life, scientists share their work with the scientific community through conferences and publishing in scientific journals.