

Water mixture rescue
View Sequence overviewStudents will:
- define sediment, sedimentation, homogeneous, and heterogeneous.
- use the particle model to describe density.
- use their understanding of density to the separation of oil, water, and sediment.
Students will represent their understanding as they:
- write a hypothesis for an experiment.
- use density to identify the layers that form in a mixture.
- construct an argument supported by evidence and reasoning to support or reject a hypothesis.
In this lesson, assessment is formative.
Feedback might focus on students’ ability to:
- write a hypothesis.
- understand and explain how the property of density can be used to separate a mixture.
- record their observations in a table.
- compare their observations to their hypothesis.
- make a claim supported by evidence and reasoning.
Potential summative assessment
Students working at standard should:
- investigate and use a range of physical separation techniques.
- discuss the relationship between a reasoned prediction and a hypothesis, identifying essential elements of a hypothesis, and using a provided scaffold to develop hypotheses.
- analyse conclusions and claims to identify facts or premises that are taken for granted to be true, and consider their relevance to conclusions.
- construct tables, spreadsheets and graphic organisers to collect data and information.
- draw a logical conclusion in consideration of the method of data collection, quality of evidence and limitations or significance of a claim.
Whole class
Water mixture rescue Slides
Video: Rainwater tank sludge build-up (0:07)
Each group
Filtered rainwater mixture in a beaker or flask that has been allowed to sit at least 30-60 minutes
Separating funnel (alternatively use for a class demonstration)
Retort stand
Retort ring
Clamp
3 x 200 mL beakers (one for each density layer in the mixture)
Permanent marker
Each student
Individual science notebook
Discovering density Resource sheet
Scissors
Glue
Lesson
The Inquire phase allows students to cycle progressively and with increasing complexity through the key science ideas related to the core concepts. Each Inquire cycle is divided into three teaching and learning routines that allow students to systematically build their knowledge and skills in science and incorporate this into their current understanding of the world.
When designing a teaching sequence, it is important to consider the knowledge and skills that students will need in the final Act phase. Consider what the students already know and identify the steps that need to be taken to reach the level required. How could you facilitate students’ understanding at each step? What investigations could be designed to build the skills at each step?
Read more about using the LIA FrameworkRe-orient
Remind students of the experiment last lesson on the different types of filters. Discuss how the different filters had different-sized pores.
(Slide 30) Discuss the different sized particles on the slide and which ones would fit through the pores of the green filter. Students should identify that the blue circle will “fit” through the filter pores.
(Slide 30 animation 1) Discuss how one of the properties of the blue particle is its small size, and that this property allows us to separate the blue particles from the mixture.
Pose the question: Will any of the other particles be small enough to fit through the filter pores?
(Slide 30 animation 2) Discuss how some of the particles have uneven shapes (this is one of their properties) and how this could affect whether they can pass through the filter.
The Inquire phase allows students to cycle progressively and with increasing complexity through the key science ideas related to the core concepts. Each Inquire cycle is divided into three teaching and learning routines that allow students to systematically build their knowledge and skills in science and incorporate this into their current understanding of the world.
When designing a teaching sequence, it is important to consider the knowledge and skills that students will need in the final Act phase. Consider what the students already know and identify the steps that need to be taken to reach the level required. How could you facilitate students’ understanding at each step? What investigations could be designed to build the skills at each step?
Read more about using the LIA FrameworkIdentifying and constructing questions is the creative driver of the inquiry process. It allows students to explore what they know and how they know it. During the Inquire phase of the LIA Framework, the Question routine allows for past activities to be reviewed and to set the scene for the investigation that students will undertake. The use of effective questioning techniques can influence students’ view and interpretation of upcoming content, open them to exploration and link to their current interests and science capital.
When designing a teaching sequence, it is important to spend some time considering the mindset of students at the start of each Inquire phase. What do you want students to be thinking about, what do they already know and what is the best way for them to approach the task? What might tap into their curiosity?
Read more about using the LIA FrameworkSettle or float?
Invite students to observe the rainwater mixture that has been sitting for a while and has started to separate.
Discuss how some particles of the mixture have settled on the bottom, and other particles are floating on the top of the mixture. Encourage students to notice the oil layer that is on top of the water layer.
Pose the question: What makes some particles sink, and others float?
The Inquire phase allows students to cycle progressively and with increasing complexity through the key science ideas related to the core concepts. Each Inquire cycle is divided into three teaching and learning routines that allow students to systematically build their knowledge and skills in science and incorporate this into their current understanding of the world.
When designing a teaching sequence, it is important to consider the knowledge and skills that students will need in the final Act phase. Consider what the students already know and identify the steps that need to be taken to reach the level required. How could you facilitate students’ understanding at each step? What investigations could be designed to build the skills at each step?
Read more about using the LIA FrameworkThe Investigate routine provides students with an opportunity to explore the key ideas of science, to plan and conduct an investigation, and to gather and record data. The investigations are designed to systematically develop content knowledge and skills through increasingly complex processes of structured inquiry, guided inquiry and open inquiry approaches. Students are encouraged to process data to identify trends and patterns and link them to the real-world context of the teaching sequence.
When designing a teaching sequence, consider the diagnostic assessment (Launch phase) that identified the alternative conceptions that students held. Are there activities that challenge these ideas and provide openings for discussion? What content knowledge and skills do students need to be able to complete the final (Act phase) task? How could you systematically build these through the investigation routines? Are there opportunities to build students’ understanding and skills in the science inquiry processes through the successive investigations?
Read more about using the LIA FrameworkUnderstanding density
Discuss how the ability of particles in a mixture to separate into different layers is another property that students can explore.
(Slide 31) Explain how some equipment can make it easy to separate the layers in a mixture. Show students a separating funnel and how it can be used to separate each layer of a mixture.
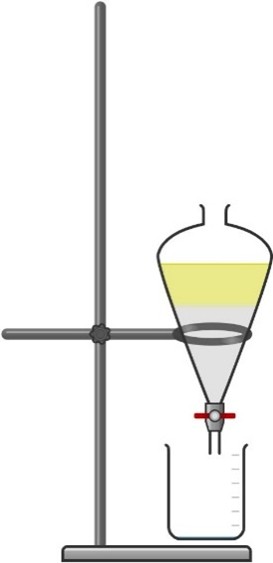
Invite students to set up their equipment and to pour their filtered rainwater mixtures into the separating funnel. Allow the mixture to stand until the layers form.
Alternatively, separation via a separating funnel can be demonstrated for the whole class, instead of being carried out in student groups.
✎ STUDENT NOTES: Draw the separating funnel containing the freshly poured rainwater mixture.
Allow time for students to observe the mixture. Explain that the mixture contains a number of different particles.
(Slide 32) ✎ STUDENT NOTES: Define “suspension” as a mixture in which solid particles are evenly spread throughout a liquid or gas but are large enough to settle out over time.
Pose the question: What will the mixture look like if we let it sit for 30 minutes?
(Slide 33) Discuss the key components of a hypothesis. Invite students to use the scaffold (If…then…because…) to write a hypothesis for what the rainwater mixture will look like after 30 minutes.
✎ STUDENT NOTES: Write a hypothesis for what the rainwater mixture will look like after 30 minutes.
Explain that you will return to observe this mixture in the Integrate routine.
Discuss how rainwater can sit in a tank for a long time before it is used. Correlate this to the separating funnel.
(Slide 34) Repose the question: What makes some particles sink, and others float?
Discuss how scientists sometimes use models to explain what is happening in mixtures. If appropriate, revise the particle model as an example of a physical model that is used for explanations.
(Slide 35) Explain that each particle in a mixture has a different mass and volume. Invite student pairs to provide a definition for volume and write it down on a sticky note. When completed, join student pairs together into groups of four and invite them to compare their definitions. Encourage groups to select the best words and phrases to write a new group definition for volume. Repeat this process for groups of eight.
Select key words from the final definitions to develop a class definition for volume, similar to “the amount of 3D space occupied by a solid, liquid, or gas”.
- What do we mean by space in science?
- If two objects look the same size, do they always have the same volume?
- What is actually taking up space in a substance?
- In a mixture, do all particles take up the same amount of space?
- Which words appear in all the definitions?
- Which definition is easiest to understand? Why?
- Does your definition work for solids, liquids, AND gases?
- Would a younger student understand your definition?
- Does volume change if the shape changes?
- What is the MOST important idea we must include?
- Can we make this definition shorter but still accurate?
- Would a scientist agree with this definition?
- How would you measure volume in a lab?
✎ STUDENT NOTES: Write the class definition for volume.
Discuss how students are using a process similar to the peer review process, where scientists share ideas and discuss different perspectives to lead to improvements in ideas and definitions.
(Slide 36) Pose the question: Can two particles have the same volume but different masses?
Discuss how students need to define mass to answer the question. Repeat the previous peer review process to define mass (the amount of matter in a particle).
- In a mixture, do all particles have the same mass?
- If you added more particles, what happens to the mass?
- What words do your definitions have in common?
- Which definitions might confuse someone? Why?
- Are you describing heaviness or something more scientific?
- Do we need to include the idea of matter or particles?
- Would your definition change on the Moon? Does mass depend on gravity?
- How is mass different from volume?
- Can something have a lot of volume but small mass?
- What is the most important idea we must include?
- Can we replace everyday words like “heavy” with scientific ones?
- Is our definition short, clear, and correct?
- Can we include particles in a meaningful way?
- How do we measure mass in a lab?
- What units do we use for mass?
✎ STUDENT NOTES: Write the student definition for mass (the amount of matter in an object). Remind students how scientists used peer review to improve their scientific ideas.
(Slide 37) Explain that both mass and volume are needed to understand why things float or sink. Use the analogy of a school bag that has the same volume when full of air or full of books. The number of particles (the mass) in a bag of air is much less than the number of particles (the mass) in a bag of books. Discuss how the book-filled bag will sink in water, while the second air-filled bag will float.
(Slide 38) Explain how dots can be used to represent matter in an object. The matter particles (dots) in the left-hand side shape are more tightly packed together than the matter particles in the right-hand side shape.
(Slide 38 animation) Discuss which object has more mass.
(Slide 39) Discuss how both shapes have the same volume (the same amount of space). Introduce the term “density” as how tightly packed matter is in an object. Discuss which object has the greatest density (animation).
(Slide 40) ✎ STUDENT NOTES: Write the definition and equation for density: the amount of matter in a set volume.
(Slide 41) Discuss which shape has the greatest density (answer animated).
Provide students with the Discovering density Resource sheet. Allow students to read the information on density and how it is represented by the closely packed matter dots for the water and the cut-out shapes.
Allow students time to cut out the shapes at the bottom of the second page and compare the density of the matter dots of each shape to that of water. Shapes with low density “matter dots” will float on top of the water, while shapes with high density “matter dots” will be at the bottom of the tank.
✎ STUDENT NOTES: Complete the Discovering density Resource sheet.
Scientific models
Models may be physical (globe or skeleton), mathematical (equations that represent relationships), computerised (global warming), or conceptual (diagram of the water cycle).
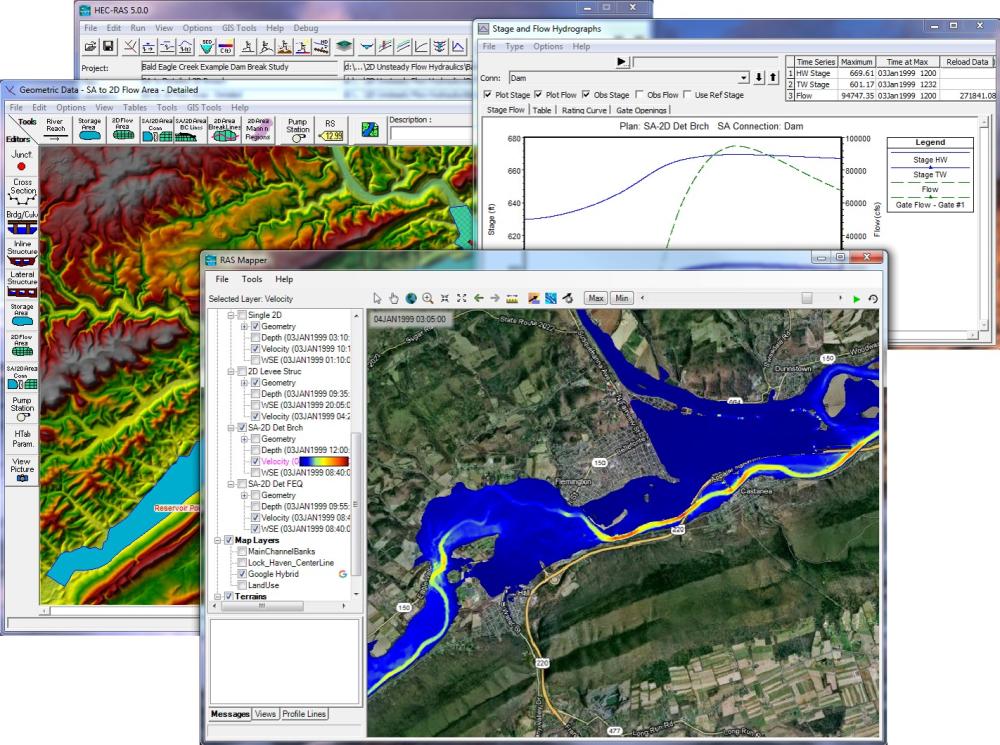
There are many different reasons that models are used in science. Models may be physical (globe or skeleton), mathematical (equations that represent relationships), computerised (global warming), or conceptual (diagram of the water cycle).
Models can be used to:
- understand complex systems by breaking large systems into manageable parts. For example, climate models can be used to simulate Earth’s atmosphere and oceans to understand weather patterns and climate change.
- make predictions about how different conditions would affect the outcome. For example, models of disease spread help to predict how a new illness could move through a population.
- safely test hypotheses that might be too dangerous, expensive or unethical to test in real life. For example, car test simulations.
- communicate ideas through visualising and explaining difficult concepts. For example, the Bohr model of the atom used by students.
- explore things that can’t be directly observed due to being too large or too small. For example, to model the solar system or the structure of DNA.
All models have limitations, and it is useful to discuss these with students whenever the models are used.
There are many different reasons that models are used in science. Models may be physical (globe or skeleton), mathematical (equations that represent relationships), computerised (global warming), or conceptual (diagram of the water cycle).
Models can be used to:
- understand complex systems by breaking large systems into manageable parts. For example, climate models can be used to simulate Earth’s atmosphere and oceans to understand weather patterns and climate change.
- make predictions about how different conditions would affect the outcome. For example, models of disease spread help to predict how a new illness could move through a population.
- safely test hypotheses that might be too dangerous, expensive or unethical to test in real life. For example, car test simulations.
- communicate ideas through visualising and explaining difficult concepts. For example, the Bohr model of the atom used by students.
- explore things that can’t be directly observed due to being too large or too small. For example, to model the solar system or the structure of DNA.
All models have limitations, and it is useful to discuss these with students whenever the models are used.
The difference between mass and weight
Mass and weight are closely related concepts, but they are not the same.

Mass and weight are closely related concepts, but they are not the same. Mass refers to the amount of matter in an object (how many particles it contains). It does not depend on where the object is located and remains constant whether the object is on Earth, the Moon, or in space. Mass is measured in units such as kilograms (kg) or grams (g), typically using a balance, which compares an object to known masses.
Weight is a force. It is the pull of gravity acting on an object’s mass. Because weight depends on gravity, it can vary according to the location. For example, an object will weigh less on the Moon than on Earth because the Moon has a weaker gravitational field. Weight is measured in Newtons (N) using a spring scale or force meter, and can be calculated using the equation: weight = mass × gravitational field strength.
The key difference is that mass is about how much matter an object contains, while weight is about how strongly gravity pulls on that matter. This distinction is important because students often use the terms interchangeably or describe mass as “how heavy something is”, which is not scientifically accurate. Emphasising that mass stays the same everywhere, while weight changes with gravity, helps clarify this misunderstanding.
Mass and weight are closely related concepts, but they are not the same. Mass refers to the amount of matter in an object (how many particles it contains). It does not depend on where the object is located and remains constant whether the object is on Earth, the Moon, or in space. Mass is measured in units such as kilograms (kg) or grams (g), typically using a balance, which compares an object to known masses.
Weight is a force. It is the pull of gravity acting on an object’s mass. Because weight depends on gravity, it can vary according to the location. For example, an object will weigh less on the Moon than on Earth because the Moon has a weaker gravitational field. Weight is measured in Newtons (N) using a spring scale or force meter, and can be calculated using the equation: weight = mass × gravitational field strength.
The key difference is that mass is about how much matter an object contains, while weight is about how strongly gravity pulls on that matter. This distinction is important because students often use the terms interchangeably or describe mass as “how heavy something is”, which is not scientifically accurate. Emphasising that mass stays the same everywhere, while weight changes with gravity, helps clarify this misunderstanding.
Density
Density describes how much mass is packed into a given volume.
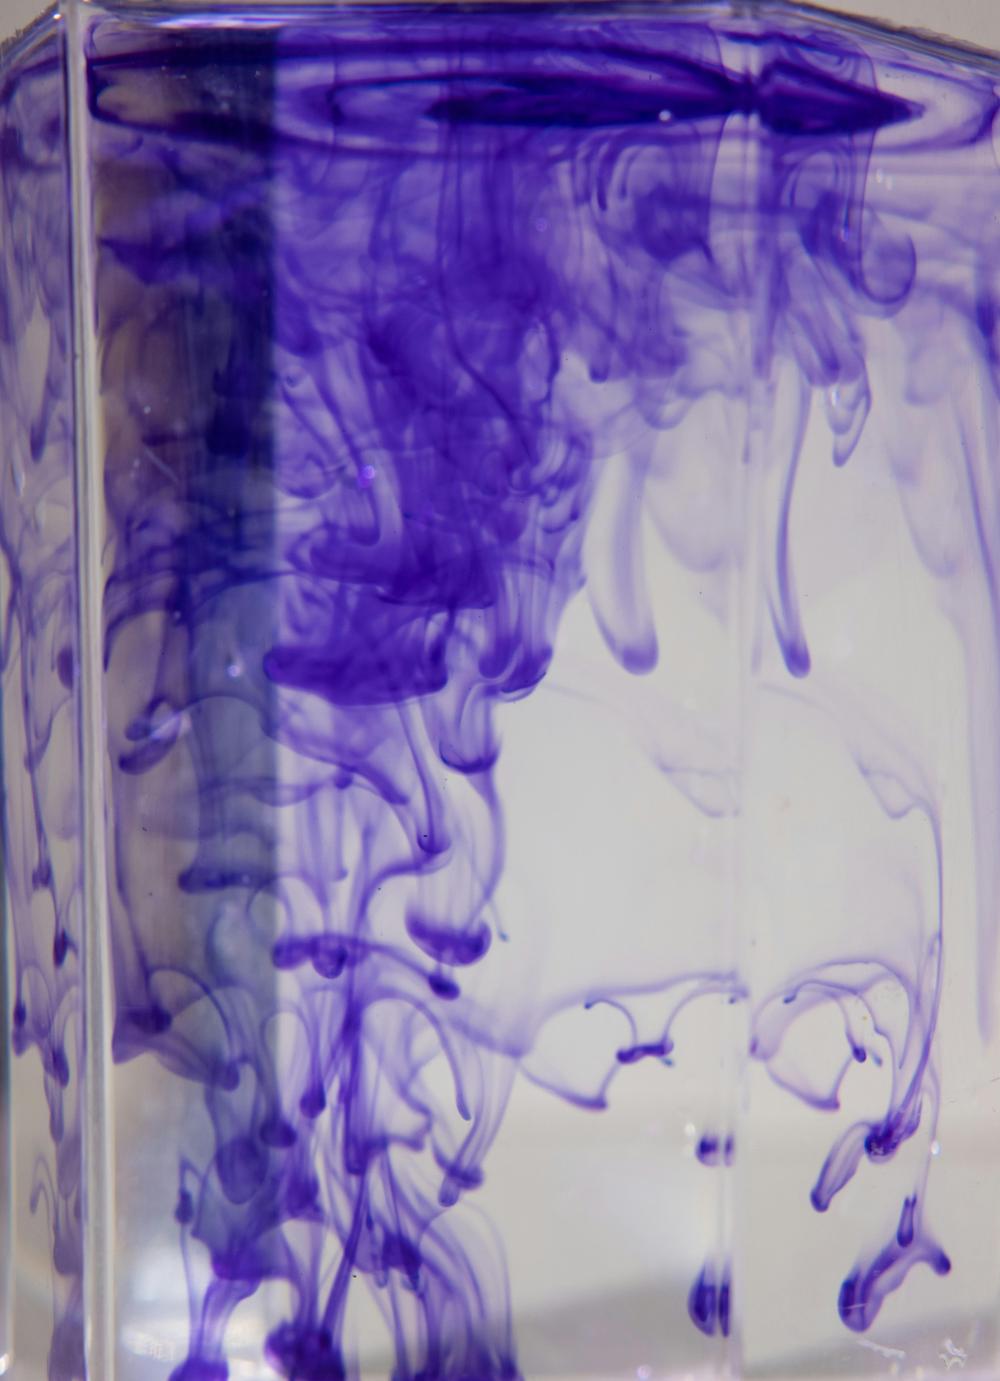
Density is a fundamental concept in science that describes how much mass is packed into a given volume. It is commonly defined using the formula:
$$\text{density} = \frac{\text{mass}}{\text{volume}}$$
It is usually measured in units such as grams per cubic centimetre (g/cm³) or kilograms per cubic metre (kg/m³). Understanding density helps students explain why some substances float while others sink, and how materials can be identified based on how tightly their particles are arranged.
At a particle level, density reflects how closely packed atoms or molecules are within a substance. Solids typically have higher densities because their particles are tightly packed in fixed positions, while gases have very low densities because their particles are far apart and move freely. Liquids fall in between, with particles that are close together but able to move past one another. Temperature can also affect density. When most substances are heated, their particles move further apart, causing the substance to expand because the average space between the particles increases. This makes the substance less dense.
In this lesson, density explains why oil floats on top of water (oil has a lower density than water) and high-density dirt particles sink to the bottom of the container.
Density is a fundamental concept in science that describes how much mass is packed into a given volume. It is commonly defined using the formula:
$$\text{density} = \frac{\text{mass}}{\text{volume}}$$
It is usually measured in units such as grams per cubic centimetre (g/cm³) or kilograms per cubic metre (kg/m³). Understanding density helps students explain why some substances float while others sink, and how materials can be identified based on how tightly their particles are arranged.
At a particle level, density reflects how closely packed atoms or molecules are within a substance. Solids typically have higher densities because their particles are tightly packed in fixed positions, while gases have very low densities because their particles are far apart and move freely. Liquids fall in between, with particles that are close together but able to move past one another. Temperature can also affect density. When most substances are heated, their particles move further apart, causing the substance to expand because the average space between the particles increases. This makes the substance less dense.
In this lesson, density explains why oil floats on top of water (oil has a lower density than water) and high-density dirt particles sink to the bottom of the container.
The Inquire phase allows students to cycle progressively and with increasing complexity through the key science ideas related to the core concepts. Each Inquire cycle is divided into three teaching and learning routines that allow students to systematically build their knowledge and skills in science and incorporate this into their current understanding of the world.
When designing a teaching sequence, it is important to consider the knowledge and skills that students will need in the final Act phase. Consider what the students already know and identify the steps that need to be taken to reach the level required. How could you facilitate students’ understanding at each step? What investigations could be designed to build the skills at each step?
Read more about using the LIA FrameworkFollowing an investigation, the Integrate routine provides time and space for data to be evaluated and insights to be synthesized. It reveals new insights, consolidates and refines representations, generalises context and broadens students’ perspectives. It allows student thinking to become visible and opens formative feedback opportunities. It may also lead to further questions being asked, allowing the Inquire phase to start again.
When designing a teaching sequence, consider the diagnostic assessment that was undertaken during the Launch phase. Consider if alternative conceptions could be used as a jumping off point to discussions. How could students represent their learning in a way that would support formative feedback opportunities? Could small summative assessment occur at different stages in the teaching sequence?
Read more about using the LIA FrameworkDensity separation
Discuss the advantages and disadvantages of this model in explaining why layers may form in a mixture. Identify the limitations of this model, including that it is two‑dimensional, does not represent 3D particle movement, and does not explain changes that occur when temperature increases.
(Slide 42) Examine the rainwater mixture in the separating funnel. Identify the different layers that have formed.
(Slide 43-44) Introduce the term “heterogeneous mixture”: a mixture of different particles that are unevenly mixed or separated into layers. Use the example of the two coffees to illustrate which mixture is heterogeneous (the coffee on the right).
✎ STUDENT NOTES: Define “heterogeneous mixture”.
(Slide 45) Discuss how the low-density oil (and particles) floats on top of the water. Identify the high-density sediment that may have settled on the bottom of the funnel.
✎ STUDENT NOTES: Draw the mixture layers in the separating funnel. Label each layer.
Discuss how water tanks can build up a layer of high-density sediment in the bottom over time. This needs to be removed regularly from tanks.
(Slide 46) ✎ STUDENT NOTES: Define “sedimentation” as the process of high-density materials settling on the bottom of a mixture.
(Slide 47) Draw students’ attention to the similarity of “sediment” (the particles that have settled) and “sedimentation” (the process of particles settling on the bottom). Invite them to select the appropriate word for the sentence “Sedimentation caused the sediment to settle on the bottom of the beaker”.
Show the video short Rainwater tank sludge build-up (0:07), which demonstrates the use of a tap at the bottom of a rainwater tank to drain the layer of sediment.
Discuss how the different layers formed in the tank. Compare this to the now separated rainwater mixture from the beginning of the lesson.
Note: Photographing the layers that have formed in the rainwater mixture will allow students to compare the separation techniques during the Act phase.
- Why do some materials sink to the bottom while others stay floating or suspended?
- Why do you think oil forms a separate layer above water?
- What might happen if the mixture is stirred again? Will the layers stay separate?
- Why is it important to remove sediment from rainwater tanks regularly?
- How does the tap (stopcock) at the bottom of a tank help remove sediment effectively?
- Why is it important to remove the bottom layer first before the others?
- What factors might affect how quickly sediment settles (e.g. particle size, movement of water)?
- How could you design an experiment to test how fast different materials settle?
Allow students time to use the stopcock to remove the sediment layer from the mixture into beaker 1. Invite students to label the beaker “High-density layer”.
Allow students time to remove the next water-based layer into beaker 2. Label the beaker “Medium-density layer”.
Pose the question: Is this layer pure water?
Discuss the different views of students (some may claim it is pure, and some may claim that it is still a mixture). Encourage students to provide evidence for their claim and to question their own assumptions.
- What kind of observations or experiments could help determine whether it is pure or a mixture?
- What counts as strong evidence in this discussion?
- What assumptions are you making about what a pure substance looks like? Does the appearance (clear/transparent, uniform, cloudy) always indicate purity?
- Can something look pure but still be a mixture?
- How might someone challenge your reasoning?
- If two students disagree, how can they evaluate whose argument is stronger?
- What would make you change your mind about your position?
- After hearing other perspectives, has your thinking changed? Why or why not?
Discuss how this layer contains water and may still have other substances (such as salt) evenly mixed throughout. Explain that this is a homogenous layer because everything is evenly mixed so that individual particles cannot be seen and do not settle over time.
(Slide 48) ✎ STUDENT NOTES: Define “homogenous mixture” as a mixture of very small different particles that are evenly mixed and do not settle over time.
(Slide 49) Invite students to identify the diagram that represents a heterogeneous mixture and a homogeneous mixture.
Examine the low-density oil layer left in the separating funnel. If students need to observe the oil layer more closely, they should first pour it into a beaker instead of handling the funnel.
(Slide 50) ✎ STUDENT NOTES: Record the relative density (more or less dense than upper or lower layers) and appearance of each layer that was separated from the rainwater mixture.
- What role does density play in whether particles sink, float, or stay suspended?
- In which layer did particles settle over time, and why?
- Did the other layers contain more than one type of particle?
- According to the Australian Government regulations, how could you use each layer?
- What are some everyday examples of suspensions?
- For example, muddy water, smoke in air.
- Can a suspension exist in gases as well as liquids? Why or why not?
Compare the diagram and results recorded in the table to the original hypothesis. Discuss the accuracy of the hypothesis.
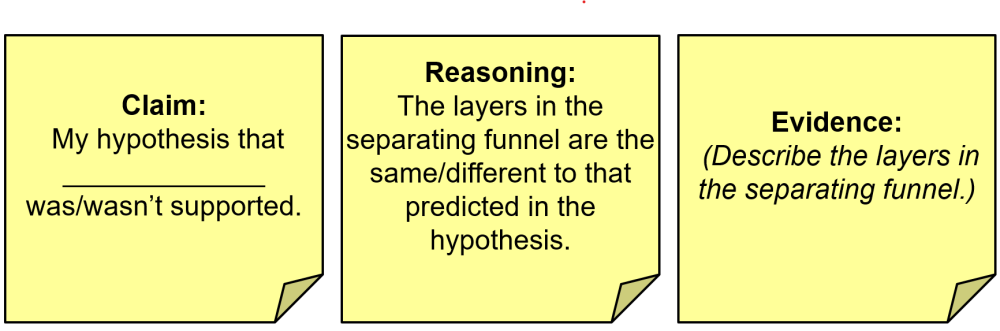
(Slide 51) ✎ STUDENT NOTES: Use argumentation with evidence and reasoning to support a claim that the original hypothesis was/wasn’t supported.
Discuss how students could use their understanding of density to make their rainwater mixture more useful in a household. If required, remind students of the regulations for the different uses of rainwater.
Reflect on the lesson
You might ask students to:
- add new words (volume, mass, density, sediment, sedimentation, homogeneous, heterogeneous) to their glossary.
- investigate separation techniques used by First Nations Australians, such as yandying.
- research how sedimentation is used in wastewater treatment.
- describe the ways in which they worked like scientists during the lesson.
Scientific vocabulary
Clarifying scientific vocabulary enables students to think, reason, and communicate like scientists.
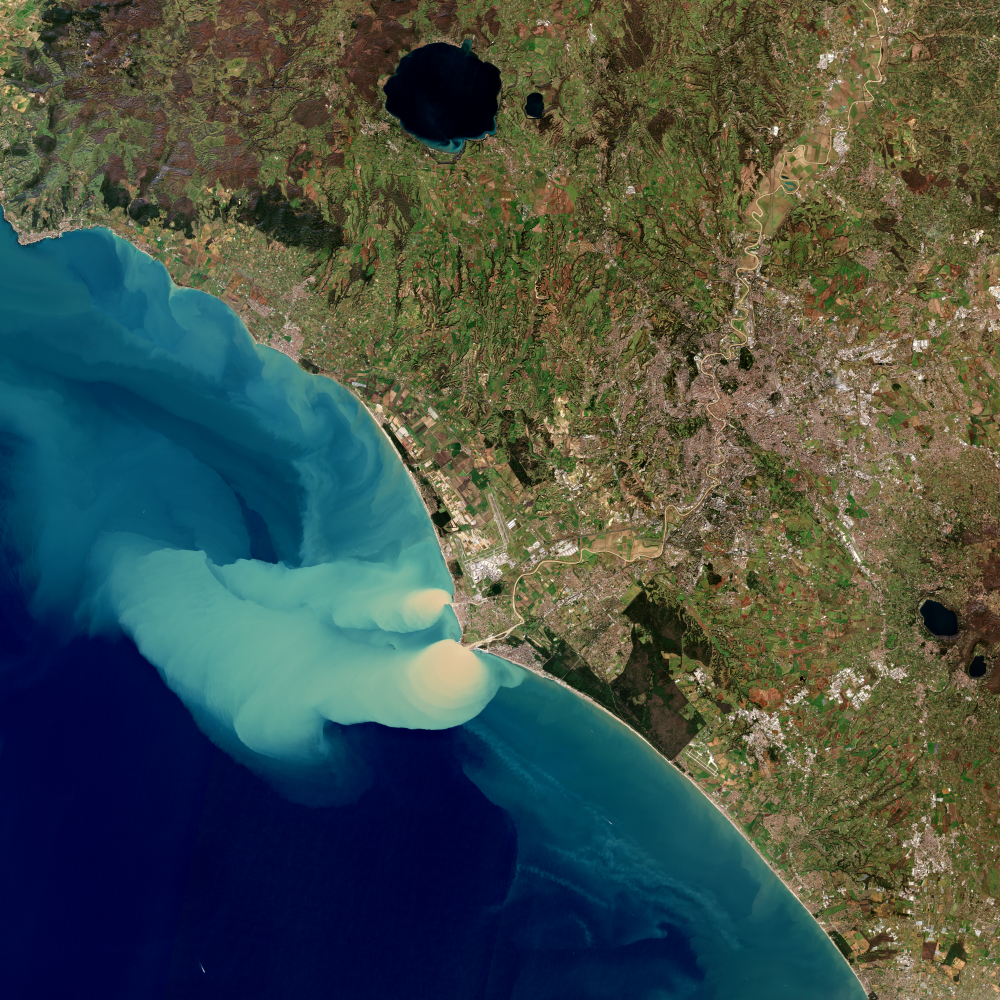
Scientific vocabulary is not just about memorising definitions—it is about enabling students to think, reason, and communicate like scientists. Words like “homogeneous” and “heterogeneous” represent abstract ideas about the structure of matter, while “sediment” (the noun) and “sedimentation” (the process) name and describe observable phenomena. Not drawing students’ attention to the way scientific language is used will:
- confuse everyday and scientific meanings.
- rely on rote definitions without understanding.
Common student alternative conceptions
Students commonly bring alternative conceptions to these terms. For example:
- homogeneous is often interpreted as meaning “pure”, leading students to incorrectly classify uniform mixtures as pure substances.
- heterogeneous may be described as “dirty” or “messy”, rather than understood as a mixture with unevenly distributed components.
- sediment is sometimes thought to be any solid, rather than particles that have settled out of a fluid (including air).
- sedimentation may be interpreted as simply “sitting still” instead of a process driven by density and gravity.
Identifying and addressing these alternative conceptions is an important step in effective teaching.
In this lesson, students observe and describe the phenomena before being introduced to the scientific language. This allows the experiences to become foundational to understanding the definitions. The terms are then compared and contrasted to support a deeper understanding and to support students in organising and consolidating their thinking.
Scientific vocabulary is not just about memorising definitions—it is about enabling students to think, reason, and communicate like scientists. Words like “homogeneous” and “heterogeneous” represent abstract ideas about the structure of matter, while “sediment” (the noun) and “sedimentation” (the process) name and describe observable phenomena. Not drawing students’ attention to the way scientific language is used will:
- confuse everyday and scientific meanings.
- rely on rote definitions without understanding.
Common student alternative conceptions
Students commonly bring alternative conceptions to these terms. For example:
- homogeneous is often interpreted as meaning “pure”, leading students to incorrectly classify uniform mixtures as pure substances.
- heterogeneous may be described as “dirty” or “messy”, rather than understood as a mixture with unevenly distributed components.
- sediment is sometimes thought to be any solid, rather than particles that have settled out of a fluid (including air).
- sedimentation may be interpreted as simply “sitting still” instead of a process driven by density and gravity.
Identifying and addressing these alternative conceptions is an important step in effective teaching.
In this lesson, students observe and describe the phenomena before being introduced to the scientific language. This allows the experiences to become foundational to understanding the definitions. The terms are then compared and contrasted to support a deeper understanding and to support students in organising and consolidating their thinking.